Common Flooring Mistakes and How to Avoid Them
August 4, 2025

August 4, 2025

Flooring is a cornerstone of home design, significantly impacting both aesthetics and functionality. The right flooring enhances a home’s beauty, complements its style, and ensures practicality for daily use. However, choosing and installing flooring can be fraught with challenges if not approached thoughtfully. From material selection to post-installation care, every step requires careful consideration to avoid costly errors. This article delves into common flooring mistakes homeowners make and offers practical guidance to sidestep them.


Choosing the Wrong Flooring Material


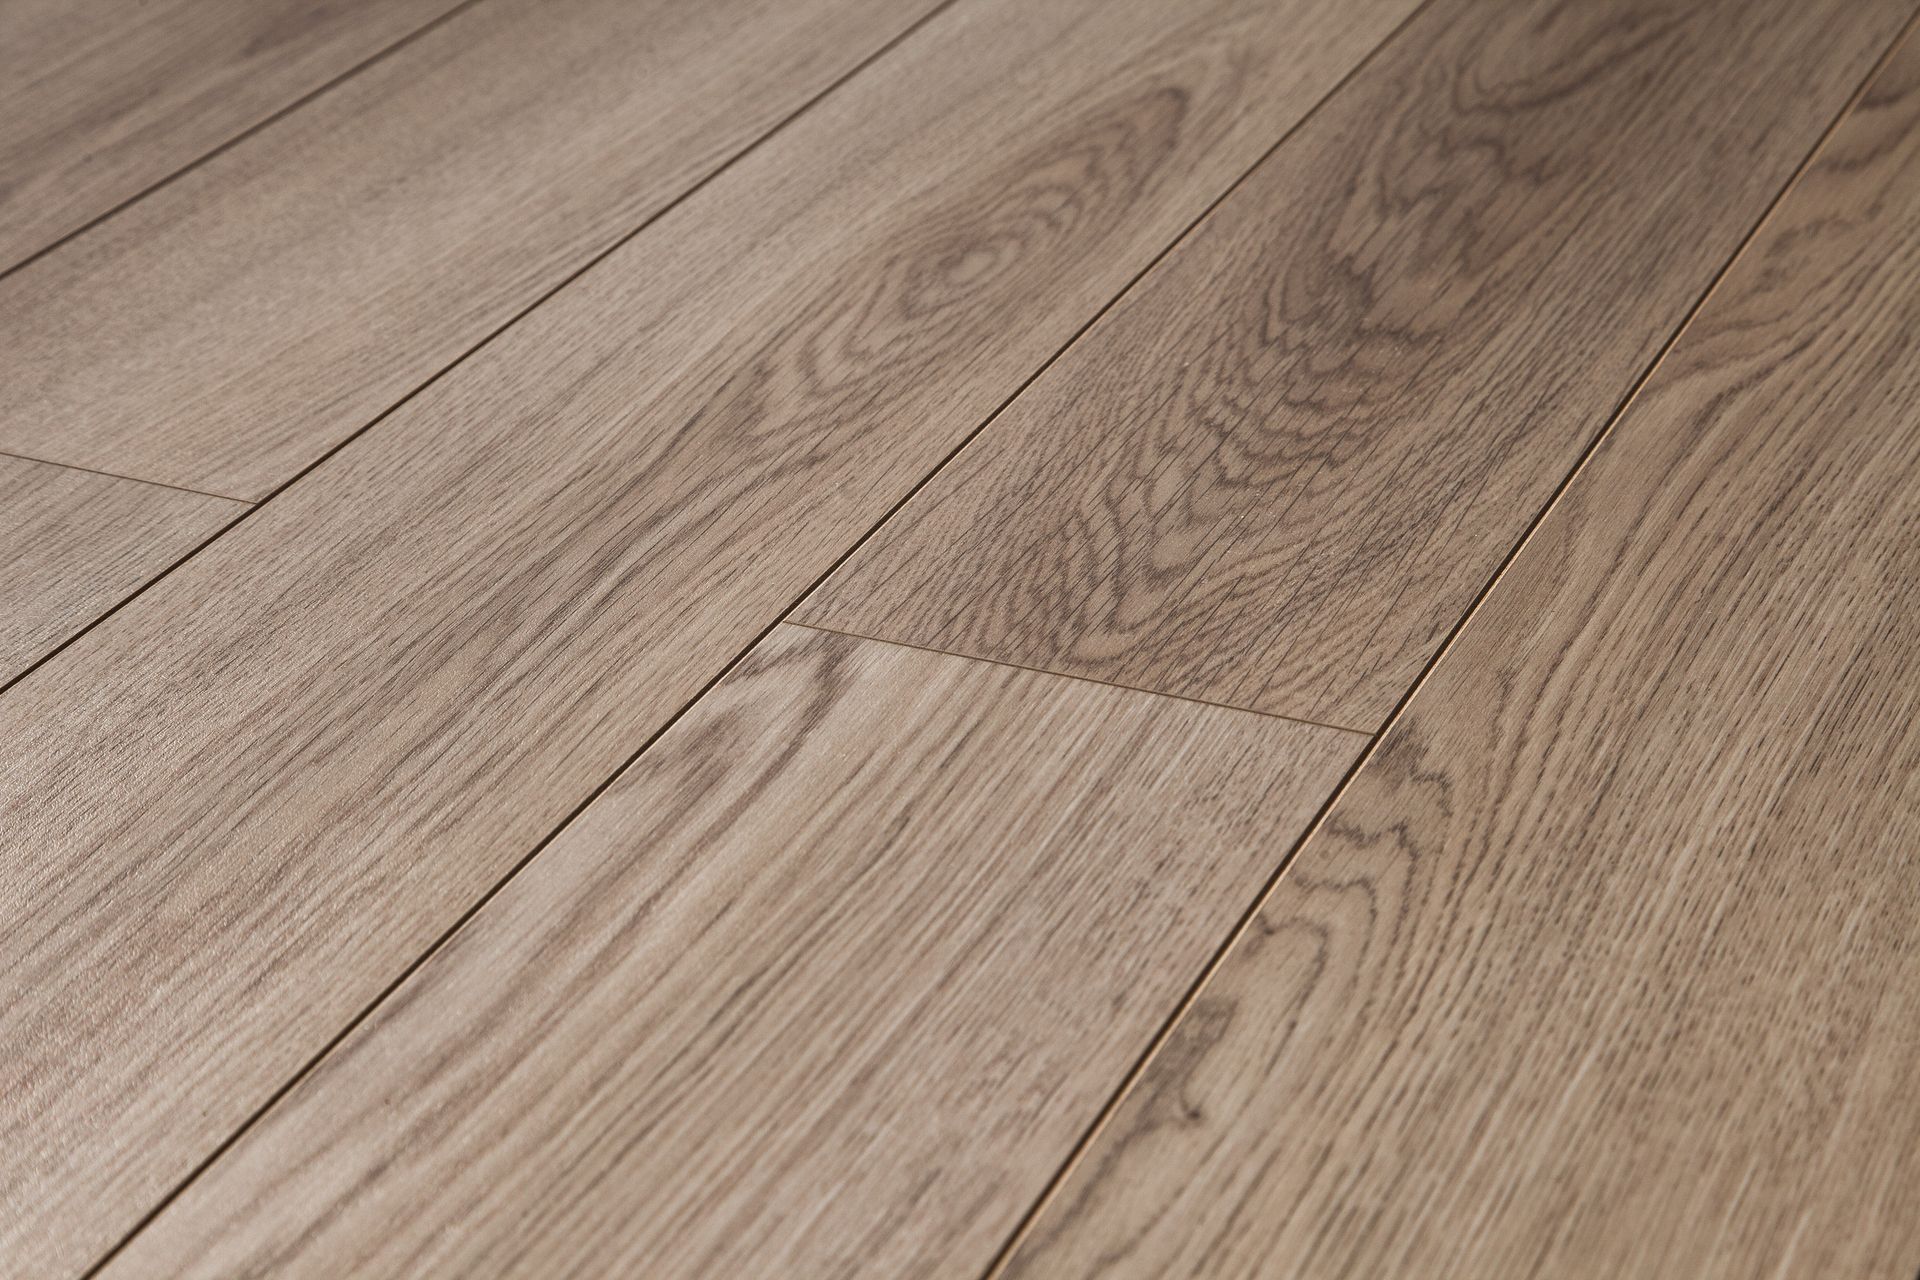
Choosing the right flooring material begins with understanding the specific requirements of each room. For instance, a kitchen has different needs compared to a bedroom due to factors such as moisture and stain resistance. It's crucial to align the flooring choice with the purpose and conditions of the space. Misunderstanding these requirements can lead to expensive and inconvenient mistakes. Therefore, taking the time to evaluate room necessities is an essential first step in flooring selection.


Equally important is the consideration of traffic levels that your flooring will endure. High traffic areas, such as hallways and living rooms, necessitate more durable materials like hardwood or tiles. Improper assessment here can lead to premature wear and significant repair costs. Maintaining accurate traffic level expectations helps in choosing materials that offer longevity and resistance to wear. According to All American Carpet Inc., luxury vinyl planks and laminate floors can last up to 25 to 30 years, but quality varies greatly with these floors.


Another aspect often overlooked in flooring selection is maintenance. Highly polished floors may look splendid, but they usually require more rigorous upkeep compared to low-sheen alternatives. Overlooking this can lead to dissatisfaction and unexpected maintenance chores. Furthermore, maintenance requirements should coexist with the homeowner's willingness and ability to sustain them. Therefore, evaluating both the material's aesthetic appeal and the ease of its maintenance is key to making a satisfactory choice.


Poor Preparation and Surface Cleaning


Preparation is a pivotal stage in successful flooring installation, starting with examining the subfloor. A compromised subfloor can affect durability and comfort. It might lead to imperfections like uneven surfaces or cracking. Skipping this examination can jeopardize the entire flooring project. It's recommended to address any issues found in the subfloor before proceeding with the installation.


Moisture checks are another critical yet frequently omitted step. Excessive moisture can lead to mold growth and warping, especially in wood floors. This can severely degrade the integrity and appearance of your flooring. Ignoring such checks can result in failure and costly repairs. Always ensure proper moisture barriers and testing are implemented to combat these potential issues.


A clean surface is essential for the adhesive or finish of the flooring to bond correctly. Insufficient cleaning can result in an array of problems from adhesion failures to aesthetic imperfections. Additionally, failing to level the surface can lead to extended installation time and the need for post-installation fixes. Lastly, it's important to acclimate the flooring material to the room’s environment. Neglecting these preparatory measures can compromise the entire installation process.


Neglecting Professional Installation


Though DIY projects can be rewarding, underestimating the challenges of flooring installation is common. Many homeowners are enticed by the potential cost savings but find themselves overwhelmed by the complexity of the task. Mistakes in installation can lead to uneven surfaces and material wastage. Consulting with professionals often prevents these costly errors. Experts bring experience and precision that ensure a flawless result.


The importance of having the right tools cannot be overstated in flooring installation. Misjudging required tools can lead to delays and additional costs. Professionals generally have access to specialized equipment that speeds up the process with precision. Beginners often miscalculate the necessity of such tools, complicating what could be a straightforward installation. Investing in or renting appropriate tools is crucial to successful DIY flooring.


Overlooking professional skills is a common mistake in flooring projects. Even if a homeowner is handy around the home, flooring requires specific expertise. Experienced professionals are adept at handling complexities like patterned tile layouts or complex cuts. Skipping quality assurance steps that professionals would typically execute can lead to long-term issues. It's wise to consider both current skills and potential gaps when contemplating a DIY approach to flooring.


Incorrect Measurements and Layout


Correct measurements are foundational to a successful flooring project. Miscalculating square footage can result in shortages and delays. Such errors usually lead to increased costs, as additional materials may need to be ordered. A meticulous measuring approach ensures that you purchase the right amount of flooring. It can also improve efficiency by minimizing waste and reducing project duration.


Expansion gaps are an essential consideration that often gets neglected. These gaps allow for natural expansion and contraction of materials due to temperature and humidity changes. Ignoring this can result in buckling or gaps that spoil the floor's appearance. Ensuring proper spacing according to the manufacturer's instructions prevents these issues. Knowledge of expansion gaps protects your flooring from premature failure.


Another critical detail is aligning patterns correctly. Poor pattern alignment can disrupt visual continuity and aesthetic appeal. Planning material cuts beforehand can avert this problem and allow consistent flow across the flooring. This step is especially crucial in rooms with complex layouts. Considering light and space directionality also enhances not only the function but also the design of the flooring alignment in your home.


Inappropriate Use of Adhesives and Fasteners


Applying incompatible adhesives is a significant mistake that can compromise your flooring's stability and longevity. Different materials require specific types of adhesives to ensure proper adhesion and performance. Failing to select the correct adhesive may lead to separations and damage over time. Always adhere to the material's manufacturer's recommendations for the best results. Doing so secures your floor against future issues.


Similarly, the extent to which fasteners are used can vary depending on the flooring material. Overuse of fasteners can damage the material while underuse might lead to floor instability. The importance of following the manufacturer's guidelines for fastener use can't be overstated. Proper fastener application ensures that the flooring remains secure and performs optimally. It is another reason why expert consultation can be advantageous.


Time is crucial in allowing adhesives to cure fully. Skipping these curing times can severely impact adhesive strength, reducing flooring lifespan. Also, failing to install a moisture barrier when necessary can allow dampness to seep through, damaging the material. Proper adhesion and moisture management are objectives to keep in mind when adhering any flooring. Such detailed attention to manufacturer's guidelines will help in averting mistakes.


Inadequate Post-Installation Care


Disregarding immediate post-installation cleanup can leave behind residues that damage your flooring. Some materials are particularly sensitive and require special cleaning agents immediately after installation. Quick and correct cleaning allows adhesives or finishes to set properly without obstruction. Neglecting this stage could lead to compromised flooring resilience. Thus, acknowledging and performing necessary post-installation steps is crucial.


It's common for homeowners to pick incorrect cleaning products, inadvertently causing harm to their flooring. Each material type has its recommended cleaning solutions and methods. Using unsuitable products can strip finishes or cause discoloration, reducing the floor's visual appeal. It's advisable to consult professionals or read product guidelines for compatible cleaners. Frequent and correct cleaning helps in maintaining your floor's integrity.


Regular maintenance is essential to prolonging the life of flooring. Neglecting this can result in deterioration and the need for expensive repairs or replacements sooner than anticipated. Implementing protective measures like mats and pads can help mitigate wear and tear. Being attentive to early signs of damage, such as warping or fading, allows for prompt corrective actions. In doing so, beautiful, lasting floors become feasible goals.


Avoiding common flooring mistakes requires careful planning and attention to detail throughout the selection, installation, and maintenance processes. By understanding potential pitfalls and implementing the strategies discussed in this article, homeowners can achieve beautiful, durable flooring that enhances their living spaces. For assistance, reach out to David's Flooring of Seattle today!

By 7074934267 September 11, 2025
Subfloor Prep in Seattle Homes: Why Flatness & Moisture Control Matter When homeowners think about new flooring, they usually focus on the surface—hardwood, luxury vinyl plank, carpet, or tile. But beneath every beautiful floor lies the real foundation of success: the subfloor . Without proper preparation, even the most durable flooring can fail prematurely. For homes across Seattle, Bellevue, Tacoma, Kent, Renton, and Kirkland, two factors are especially critical before installation: flatness and moisture control. Understanding why these matter—and how professional flooring contractors address them—can save you from costly repairs and ensure your new floor looks and performs its best for years. What Is a Subfloor and Why Does It Matter? The subfloor is the structural surface beneath your finished flooring. It’s typically made of plywood, OSB (oriented strand board), or concrete. Think of it as the “canvas” on which your floor is laid. A poorly prepared subfloor can lead to: Gaps or hollow sounds under floating floors Buckling, cupping, or warping in hardwood Adhesive failure with glue-down installations Tile cracks due to uneven stress Whether you’re installing hardwood or carpet, knowing how subfloor prep impacts long-term performance is essential. Why Flatness Is Critical 1. Preventing Floor Movement Floating floors like LVP, laminate, or engineered hardwood need a flat surface to lock properly. Even a small dip or hump can cause clicking sounds or movement underfoot. 2. Protecting Structural Integrity For nail-down hardwood or tile installations, uneven subfloors place stress on individual planks or tiles. Over time, this can cause squeaks, shifting, or cracks. 3. Meeting Manufacturer Warranties Many manufacturers specify subfloor flatness tolerances (often within 3/16" over 10 feet). Failure to meet these standards can void warranties—something homeowners in Tacoma or Kent often overlook until it’s too late. At Davids Flooring of Seattle we use specialized tools like long straightedges and laser levels to identify uneven areas before installation. The Importance of Moisture Control Seattle’s damp winters and fluctuating humidity levels make moisture management one of the biggest flooring challenges in the Pacific Northwest. 1. Protecting Hardwood Solid hardwood is highly sensitive to moisture. Too much, and boards swell and cup. Too little, and they shrink, causing gaps. That’s why homes in Bellevue, Kirkland, or Renton need careful acclimation and moisture barrier installation. 2. Safeguarding Against Mold & Mildew Excess moisture trapped beneath flooring can lead to mold growth—a common issue in basements or ground-level rooms in Kent and Tacoma homes. 3. Ensuring Adhesive Bonds Glue-down flooring requires dry subfloors. If moisture vapor seeps through concrete slabs, adhesives can break down, causing tiles or planks to loosen. We recommend moisture testing with calcium chloride kits or in-slab relative humidity meters before installation. How Professionals Prep Subfloors 1. Moisture Testing Concrete slabs are tested for vapor emissions. Wood subfloors are checked with pin or pinless moisture meters. 2. Leveling High spots are sanded or ground down. Low spots are filled with self-leveling compounds. 3. Repairs & Reinforcement Loose or squeaky plywood is screwed down. Damaged sections are replaced to prevent weak points. 4. Moisture Barriers & Underlayments Plastic sheeting or specialized vapor barriers are installed over concrete. Acoustic underlayments are used in condos across Bellevue and Seattle to reduce noise transfer. Common Seattle-Area Subfloor Challenges Older Homes: Many historic homes in Seattle and Tacoma were built with subfloor systems that don’t meet today’s flatness standards. Reinforcement and leveling are common before installing hardwood or tile. Basements: Moisture intrusion from concrete foundations is a recurring problem in Renton, Kent, and Federal Way homes. Waterproof underlayments or LVP flooring are often recommended. Multi-Family Units: Bellevue and Kirkland condos often require additional acoustic underlayments to meet HOA sound regulations. Why You Shouldn’t Skip Professional Prep DIY flooring projects often fail because homeowners underestimate subfloor prep. Even the best materials can’t perform on a poorly prepared base. Hiring a experienced flooring contractor ensures your investment lasts. FAQ: Subfloor Prep in Seattle Homes Q: Can I install new flooring over my old floor without removing it? A: Sometimes—LVP and laminate can float over existing surfaces if flat and dry. But damaged or uneven subfloors should always be addressed first. Q: How do I know if my subfloor has a moisture problem? A: Visible staining, musty odors, or high meter readings are clear signs. Professional testing gives accurate results. Q: Do I need a vapor barrier on all installations? A: Concrete subfloors almost always require them. For wood subfloors, it depends on the flooring type and room conditions. Q: How long does subfloor prep take? A: It varies—minor leveling may take a few hours, but moisture remediation or structural repairs can add days to the project timeline. Final Thoughts Subfloor preparation may not be the most glamorous part of a flooring project, but it’s the foundation of a successful installation. Flatness ensures comfort and durability, while moisture control protects your floors from the Pacific Northwest’s damp climate. At David’s Flooring, our team of professionals ensures every step is done right—from subfloor inspection to final installation. Whether you’re comparing products at our flooring store, scheduling an estimate with us, or exploring eco-friendly options in Bellevue, Kent, Renton, or Kirkland, we’ll help you achieve a flawless result. 👉 Contact us today for a free in-home consultation. We proudly serve Seattle, Tacoma, Bellevue, Kent, Renton, Kirkland, Redmond, Issaquah, Sammamish, Bothell, Shoreline, Lynnwood, Federal Way, Auburn, and the greater King and Pierce County areas with expert flooring solutions.
By 7074934267 August 28, 2025
Floating vs Glue-Down vs Nail-Down: Which Installation Method is Best for Each Floor Type? Installing new flooring often raises a key question— which method is best: floating, glue-down, or nail-down? Each has its benefits, suited to different flooring types, subfloor conditions, and performance needs. Whether you're consulting with Flooring Contractors, browsing at a Flooring Store, or planning a project in Tacoma, Renton, Kent, or Kirkland, choosing the right method ensures beauty, durability, and value. Why Installation Method Matters in the Pacific Northwest In Seattle, Bellevue, Tacoma, and other parts of the Pacific Northwest, our damp winters and seasonal humidity shifts influence flooring performance more than in many other regions. Choosing the correct installation method prevents issues like: Buckling, cupping, and gapping (common when moisture isn't controlled) Glue failure on cold, moist concrete slabs Nail penetration through thin flooring or subfloors This makes it critical to match method, material, and moisture controls—and to work with Flooring Contractors in Seattle who know PNW conditions. Installation Methods: Overview & Pros/Cons Floating (Click-Lock & Floating Glue-Assist) What it is: Planks lock together over a subfloor—but are not glued or nailed down to it. Pros: Quick installation—efficient and cost-effective Easier to repair—individual boards can be lifted Works on many subfloors (including concrete) with proper underlayment Cons: Slight “give” underfoot; may feel less solid May have hollow/dull sound if underlayment isn’t correct Expansion gaps mandatory around edges Best For: Engineered hardwood and LVP/SPC flooring (especially high-utility homes in Renton or Kent) Remodels where acoustic underlayment matters (e.g., condos in Bellevue) Glue-Down What it is: Flooring is adhered directly to the subfloor using adhesive. Pros: Stable, solid feel underfoot Great for small-tile LVT, parquet, and some engineered hardwood Reduces height transitions (helpful in multi-surface spaces) Cons: Moisture-sensitive—requires vapor barrier on concrete slabs Time-intensive—adhesive curing adds labor and timeline Harder to replace boards Best For: Luxury vinyl tile (LVT) in kitchens or vestibules Thin engineered wood or parquet (common in modern and historic home styles in Seattle or Tacoma) High-traffic areas where glass-solid adhesion offers longevity Nail-Down / Staple-Down What it is: Floorboards are mechanically fastened with nails or staples into wood subfloors. Pros: Firm, traditional hardwood look/feel Long-lasting when properly installed Can be refinished multiple times Cons: Subfloor must be wood or plywood—no concrete unless using sleepers Requires skilled installers Not suitable for thin or engineered products Best For: Solid hardwood flooring Multi-layer engineered hardwood designed for nailing Homes with tall ceilings and traditional design (e.g., craftsman in Kirkland or Shoreline) Step-by-Step Considerations for Each Method 1. Floating Floors Subfloor prep: Clean, flat, dry, and structurally sound Moisture underlayment: Managed with vapor or acoustic pads Expansion gaps: Must leave minimum ¼" to ½" along walls Edge trim: Use transition strips in doorways 2. Glue-Down Floors Moisture testing: Use calcium chloride or relative humidity tests Adhesive selection: Low-VOC adhesives are essential—especially in tight Seattle homes Trowel technique: Follow trowel recommendations for proper coverage Curing time: Avoid foot traffic during curing 3. Nail-Down Floors Subfloor requirements: Secure, flat wood or plywood subfloors Fastener spacing: Follow manufacturer standards (e.g., 6–10 inches apart) Climatic acclimation: PNW humidity shifts may require extended acclimation Finishing: Sand and finish after install for optimal longevity Local Climate & Subfloor Notes (Seattle–Tacoma Area) Moisture checks are essential: Seattle makes moisture vapor intrusion a real risk. Professional f looring contractors always test concrete before proceeding. Acclimation window: Extended acclimation (up to 7–14 days) is commonly needed for hardwood in high-moisture months. Underlayment matter: Many Bellevue and Kent homeowners now insist on acoustic underlayment for floating floors in multi-family homes—practical, quiet, and comfortable. Which Method Should You Choose? Best overall versatility: Floating installation—great for LVP and engineered click-lock hardwood; fast, economical, and forgiving. Best for feeling like “permanent” flooring: Glue-down—perfect for LVT and thin engineered floors in moisture-conscious areas. Best for traditional, long-lasting hardwood: Nail-down—ideal for solid wood or sturdily constructed engineered hardwood in classic PNW homes. Before You Finalize: Tips From Local Flooring Pros Request a subfloor and moisture evaluation —especially important in Seattle’s damp environment. Ask about low-VOC adhesives —this is important for families and indoor air quality, particularly in homes with children or pets. Confirm installer experience: Always verify if your f looring contractor is experienced in all three methods—they may only have one go-to approach otherwise. Check warranty conditions: Some warranties specify method—e.g., nailing not allowed for certain engineered woods. Seal transitions : For floating floors, make sure expansion gaps are covered with appropriate molding to prevent tripping or dirt accumulation. Final Thoughts Choosing between floating, glue-down, and nail-down installation methods isn't just a technical decision—it’s one that affects comfort, durability, aesthetic, and maintenance. From modern condos in Seattle to craftsman homes in Kirkland or multi-use spaces in Tacoma, the right installation method ensures your floor performs beautifully for years. Looking for expert guidance in pulling it all together? David’s Flooring of Seattle is your trusted local partner. Whether you're exploring options at our Flooring Store in Kent or our flooring store in Bellevue we're here to help you pick the perfect method and the perfect material for your home. 👉 Contact us today for a free in-home estimate. We proudly serve Seattle, Tacoma, Bellevue, Kent, Renton, Kirkland, Redmond, Issaquah, Sammamish, Bothell, Shoreline, Lynnwood, Federal Way, Auburn, and the greater King and Pierce County areas with expertly installed flooring built for the Pacific Northwest.
By 7074934267 August 21, 2025
Sustainable & Eco-Friendly Flooring Options for Pacific Northwest Homes Flooring is more than just a design choice—it’s the foundation of your home. And here in the Pacific Northwest, homeowners from Seattle to Tacoma, Bellevue to Kent, and Renton to Kirkland are increasingly asking for eco-friendly flooring that reflects the region’s values of sustainability, health, and long-term durability. Why Sustainable Flooring Matters in the PNW Seattle and Tacoma homeowners face unique challenges: wet winters, shifting humidity levels, and long indoor seasons. Choosing sustainable flooring provides three big advantages: Environmental responsibility – Sourced from FSC-certified forests or reclaimed wood suppliers. Healthier indoor air quality – With low-VOC finishes and adhesives , essential in tightly sealed Seattle-area homes. Durability – Materials that handle moisture, temperature changes, and heavy daily use. When you partner with experienced Flooring Contractors in Seattle WA , you’ll get guidance on which materials truly fit your space—not just look good on a showroom floor. FSC-Certified & Reclaimed Hardwood Hardwood remains a top request for homeowners working with a Flooring Company in the PNW . But sustainable hardwood comes with two key distinctions: FSC-Certified Hardwood: Verified by the Forest Stewardship Council, ensuring responsible harvesting practices and forest regeneration. Reclaimed Hardwood: Salvaged from barns, mills, or historic Seattle and Tacoma homes—each board carries unique character, reduces waste, and avoids new harvesting. Why PNW Homeowners Love It: Adds value and timeless appeal to Bellevue, Kirkland, and Seattle homes. Can be refinished multiple times, extending lifespan for 50+ years. Works beautifully in modern condos or restored craftsman homes alike. Installation Tip: Certified Flooring Contractors follow NWFA guidelines, including subfloor moisture testing and acclimation—critical in our damp climate. Natural Linoleum: An Eco-Friendly Classic Not every homeowner wants hardwood. Many families visiting our Flooring store in Kent or Bellevue ask for durable, low-maintenance, eco-friendly alternatives. Natural linoleum is one of the best options. What It’s Made Of: Linseed oil, pine rosin, limestone, wood flour, and jute backing. 100% renewable and biodegradable. Why It’s Sustainable: Long lifespan (often 30–40 years). Naturally anti-bacterial and hypoallergenic—great for family homes in Kent and Renton. Certified low-VOC through programs like GREENGUARD Gold. Best Uses: Kitchens, mudrooms, and play spaces where durability and easy cleaning are essential. Many Kirkland homeowners love Marmoleum’s bold patterns for a modern design twist. Indoor Air Quality: A PNW Priority During long Seattle winters, families spend most of their time indoors. That makes indoor air quality one of the biggest considerations when choosing new flooring. When shopping at a our Flooring store in Bellevue or Kent, WA or hiring us as your trusted flooring contractor, ask about these certifications: FloorScore® – Ensures flooring materials release very low VOCs. GREENGUARD Gold – Even stricter standards, often used for schools and healthcare. Low-VOC adhesives and finishes – Often the “hidden” source of indoor pollution. By choosing certified products, homeowners in Tacoma, Renton, and Bellevue can breathe easier while protecting children and pets from unnecessary chemical exposure. Installation Best Practices in Seattle, Tacoma & Beyond Even the most eco-friendly floors can fail if installed incorrectly. That’s why working with professional Flooring Contractors is so important. Best Practices We Follow at David’s Flooring: Job-site readiness: HVAC running, space at service conditions. Moisture testing: Concrete vapor emission testing, wood subfloor checks. Acclimation: FSC hardwoods and natural linoleum conditioned to the home’s environment. Underlayment selection: Proper vapor barriers in basements, soundproofing in condos. Low-VOC adhesives and finishes: Protecting both installation crews and homeowners. For homes in Bellevue, Kirkland, or Renton, these steps ensure floors last for decades, not just years. Care & Maintenance for Sustainable Floors Keeping your eco-friendly floors beautiful is part of sustainability—longer lifespan equals less waste. Hardwood: Maintain humidity (30–50%), use area rugs, and refinish instead of replacing. Linoleum: Mop with mild, pH-neutral cleaners. Recoat with protective finishes every 10–15 years. Pro Tip: Homeowners in Seattle, Tacoma, and surrounding areas should place heavy-duty mats near entryways. This protects against the constant rain and grit that can damage even the toughest finishes. Avoiding Greenwashing: How to Spot True Eco-Friendly Flooring Many products are marketed as “green,” but only some meet rigorous standards. If you’re shopping at our Flooring Store in Bellevue or Kent , here’s what to check: FSC Certification for hardwood. FloorScore® or GREENGUARD Gold for low emissions. EPDs (Environmental Product Declarations) for transparency on environmental impact. Durability fit: Choose based on actual usage—families in Renton may need linoleum durability, while Kirkland luxury homes might prioritize reclaimed hardwood aesthetics. Frequently Asked Questions About Sustainable Flooring in the PNW 1. What eco-friendly flooring is best for Seattle’s wet climate? For Seattle and Tacoma homes, FSC-certified hardwood with proper sealing or natural linoleum is ideal. Both hold up well against moisture when installed by professional f looring contractors 2. Is reclaimed wood flooring popular in Bellevue and Kirkland? Yes! Homeowners working with us in Bellevue and Kirkland often choose reclaimed wood for its unique character and sustainability. It’s especially valued in luxury homes and remodels that highlight local history. 3. How can I make sure flooring from a Seattle flooring store is truly eco-friendly? Look for FSC certification for wood products, FloorScore® or GREENGUARD Gold for air quality, and ask your flooring contractor about adhesives and finishes to ensure they are low-VOC. 4. Does eco-friendly flooring cost more in Renton or Kent compared to traditional flooring? Not always. While reclaimed hardwood can be a premium option, linoleum and certain FSC hardwoods are competitively priced. Many homeowners in Kent and Renton find that long-term durability offsets the upfront investment. 5. Do eco-friendly floors last as long as traditional options? Absolutely. With proper installation and care, reclaimed hardwood can last 50+ years, and linoleum can last up to 40 years. The key is working with a local and trusted flooring contractor to ensure correct installation. Final Thoughts Sustainable flooring isn’t just a style—it’s a lifestyle. By choosing FSC-certified hardwood, reclaimed wood, or natural linoleum , Seattle and Tacoma homeowners can enjoy beautiful, durable floors while protecting indoor air quality and the environment. If you’re ready to take the next step, David’s Flooring is your trusted local partner. Whether you’re comparing products at our flooring stores in Kent or Bellevue, hiring Flooring Contractors in Tacoma WA , or browsing options in Bellevue, Kent, Renton, or Kirkland , we’ll help you find the perfect eco-friendly floor for your home. 👉 Contact us today for a free in-home estimate. We proudly serve Seattle, Tacoma, Bellevue, Kent, Renton, Kirkland, Redmond, Issaquah, Sammamish, Bothell, Shoreline, Lynnwood, Federal Way, Auburn, and the greater King and Pierce County areas with sustainable flooring solutions built for the Pacific Northwest.
Show More →